Cinematic Glow Reels Editing Tutorial Using CPK (CapCut) App
I’m going to show you how to create those trending cinematic glow Instagram reels using the CPK (CapCut) application. Make sure you watch this tutorial till the end—I’ll be sharing the actual method to add cinematic glow, include lyrics, and apply the perfect effects to take your edits to the next level.
🔧 Step 1: Install the CPK App
First of all, ensure you have the CPK app (a modified CapCut version). If you don’t have it, just check our Telegram channel or search for it online to download and install.
🌐 Step 2: Connect to a VPN
Some features in CPK may require VPN access. Simply go to Google Play Store, install any free VPN app, open it, and click “Connect”.
🎬 Step 3: Load Your Video in CapCut
Open the CPK/CapCut app and click on ‘New Project’. Select the video you want to edit. Tap “Add” to bring it into the timeline.
Initially, your video will appear raw—no edits applied. But don’t worry, we’ll transform it completely!
🎥 Pro Tip:
The most important part of cinematic editing is the video recording itself. Make sure the sky is beautifully captured, preferably between 3 PM to 4 PM. Good lighting = better glow effects.
✨ Step 4: Add the Cinematic Glow Effect
Now, tap on ‘Effects’ → go to ‘Video Effects’. Here, you have two amazing options:
- Under ‘Night Club’: Use Colorless Flash
- Under ‘Light’: Use Dreamy Glow
We recommend starting with Colorless Flash for more control. Tap ‘Done’, then adjust:
- Atmosphere: 100
- Speed: 0
Now decrease the Range and Glow slightly to keep things balanced. You can also modify the Glow Color to match your video mood. Choose a soft hue that complements the subject. Once satisfied, click “Done”.
🌀 Step 5: Try Alternative Glow with Dreamy Effect
If you prefer a simpler method, try the Dreamy Glow under Light effects. Apply it, and then tweak:
- Adjust Range
- Decrease or increase Size
- Set a Color Tone if needed
Both effects are visually stunning. Test both and keep the one that fits your video the best.
🎨 Step 6: Apply Filters and Adjust Colors
Click on ‘Adjust’ and go to ‘Filters’. Choose a cinematic filter. This will instantly enhance the tone and give a professional feel.
Then, go back to Adjust and fine-tune:
- Brightness: Slightly Increase
- Brilliance: Increase to boost glow visibility
- Saturation: Enhance colors
- HSL: Customize each color (e.g., make green richer)
- Shadows: Slightly reduce for contrast
- Temperature: Adjust to warm or cool tones
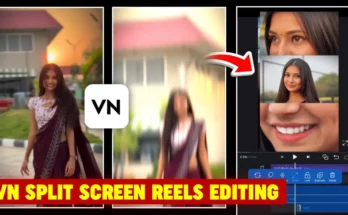
🎵 Step 7: Add Lyric Overlays
Want to add that viral lyrical touch?
- Mute the base video audio by selecting ‘Mute Clip’
- Tap ‘Overlay’ → then ‘Add Overlay’
Search YouTube for trending lyric videos and download one. Rotate and resize the lyrics as needed. Go to ‘Splice’ and set it to ‘Lighten’ or ‘Screen’ to remove black background.
Use ‘Mask’ → Horizontal to hide watermarks or names. Position the lyrics on the top of the screen for best visibility.
🎭 Step 8: Enhance with Visual Effects
Want that extra flair? Head to:
- ‘Video Effects’ → search ‘Blur’
- Use ‘Halo Blur’ for a cinematic transition
- Then, search ‘Butterfly’ and apply the effect to your clip
This adds a magical finishing touch to your reel.
📤 Step 9: Export Your Video in High Quality
Once you’re satisfied with your cinematic glow reel, hit the Export button. Set everything to maximum (4K, high FPS, no compression) and save it to your device.
📌 Final Words
And that’s it! You’ve successfully created a cinematic glow reel with lyrics using CapCut (CPK). This method is beginner-friendly but gives professional-level results.
Don’t forget to check out CapCut’s official site for more templates and editing ideas, or browse royalty-free music on Pixabay Music.
Stay creative, spread joy, and I’ll see you in the next video!