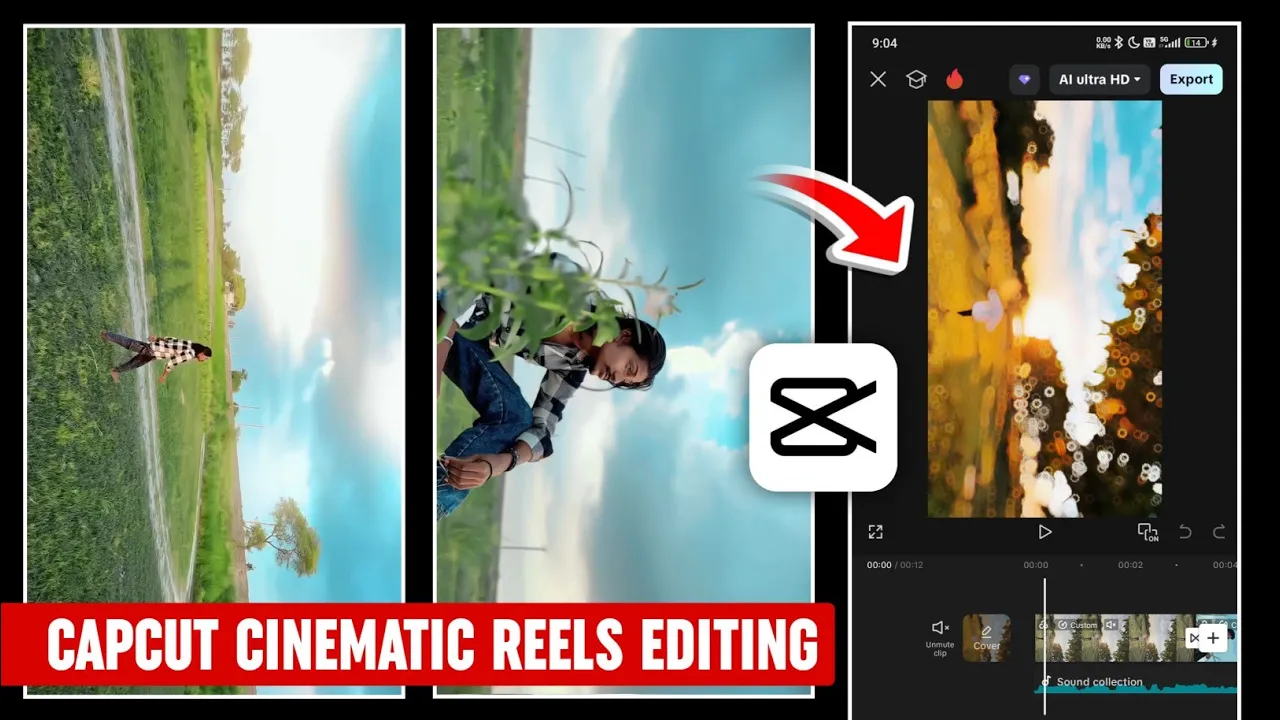
How to Edit Viral Cinematic Reels Using the CPK (CapCut) App – Full Tutorial
Are you ready to create viral cinematic reels that trend on Instagram? In today’s tutorial, we’ll show you exactly how to edit stunning cinematic videos using the CPK app (a modified CapCut version). If you’re into editing videos with trending songs like “Sajna Say Yes” or “Syaara”, then this tutorial is your complete guide.
These kinds of edits consistently go viral on Instagram Reels. So, if you learn this method today, you can keep producing trendy content not just now, but in the future too, and grow your page faster. Let’s dive in!
What You’ll Need
- CPK App (CapCut Mod) – Download Official CapCut (or find CPK mod from trusted modding communities)
- A VPN – CPK might need VPN access. You can use VPN Master or Turbo VPN
- Your pre-recorded video clips
Step 1: Setting Up CPK
First, download and install CPK. Open your VPN, connect to any server, and then launch CPK. Click on New Project and select the clips you want to edit. Arrange them in sequence and click Add to bring them into your editing timeline.
Step 2: Add the Music
Before anything else, mute all clips by clicking Mute Clip. Then go to Audio → Sounds → Files. Select a music file from your device, or use Extract Audio from a video to pull sound from a reel you like.
For example, you can extract the audio of the trending “Syaara” song. Once imported, click the plus (+) icon to add the audio to your timeline.
Step 3: Trim and Arrange Clips
Remove unnecessary parts from your clips. If something feels off or has poor quality, simply tap on it and delete. Now, arrange your clips to sync with the beat of the song. This step makes your video feel professional and rhythmic.
Step 4: Apply Slow Motion
Slow motion adds a cinematic feel. Tap a clip → Speed → Curve → Custom. Grab the points on the curve and drag down to create slow motion segments. Focus on transitions or impactful moments in the song.
Once all clips are adjusted, make sure not to apply Smooth Quality yet—it can cause lag during editing. Apply it only at the end.
Step 5: Color Grading
Click each clip individually and go to Adjust:
- Reduce Brilliance
- Increase Brightness
- Boost Contrast & Sharpness
- Adjust Saturation based on clip
Use filters like Orange & Blue for cinematic tones. You can also fine-tune colors in HSL to target green, red, or blue tones specifically.
Step 6: Skin Retouching (Optional)
Want a glowing face? Go to Retouch → Face → Skin Tone and increase whiteness or apply light pink. Also use Whitening for added effect.
Step 7: Add Effects and Transitions
Go to Animation → In and choose popular effects like Cross Opening or Blur Fade. If you’re unsure, go with the viral Hello Blur effect.
To enhance flow between clips, add Transitions like Zoom or Pull Out for seamless movement.
You can also explore Combo Animations for viral options like Bend Zoom.
Step 8: Final Smooth Slow Motion
Once editing is complete, revisit your slow-motion clips and now apply Smooth Quality by going to Speed → Curve → Quality → Better. This ensures the final playback is smooth and lag-free.
Step 9: Export in High Quality
Tap Export and select the highest quality settings (e.g., 1080p or 4K, 60fps). This will ensure your reel is crisp and Instagram-ready.
Conclusion
That’s it! You’ve now learned how to create cinematic, viral-quality reels using the CPK (CapCut Mod) app. From music syncing and slow motion to color grading and smooth transitions—this method gives your reels the professional edge needed to trend on Instagram.
Feel free to experiment with different color filters, transitions, and effects. And if you’re looking to grow on social media with high-quality edits, consistency is the key.
Useful Resources:
Thanks for reading! See you in the next tutorial—until then, stay creative and keep sharing happiness!