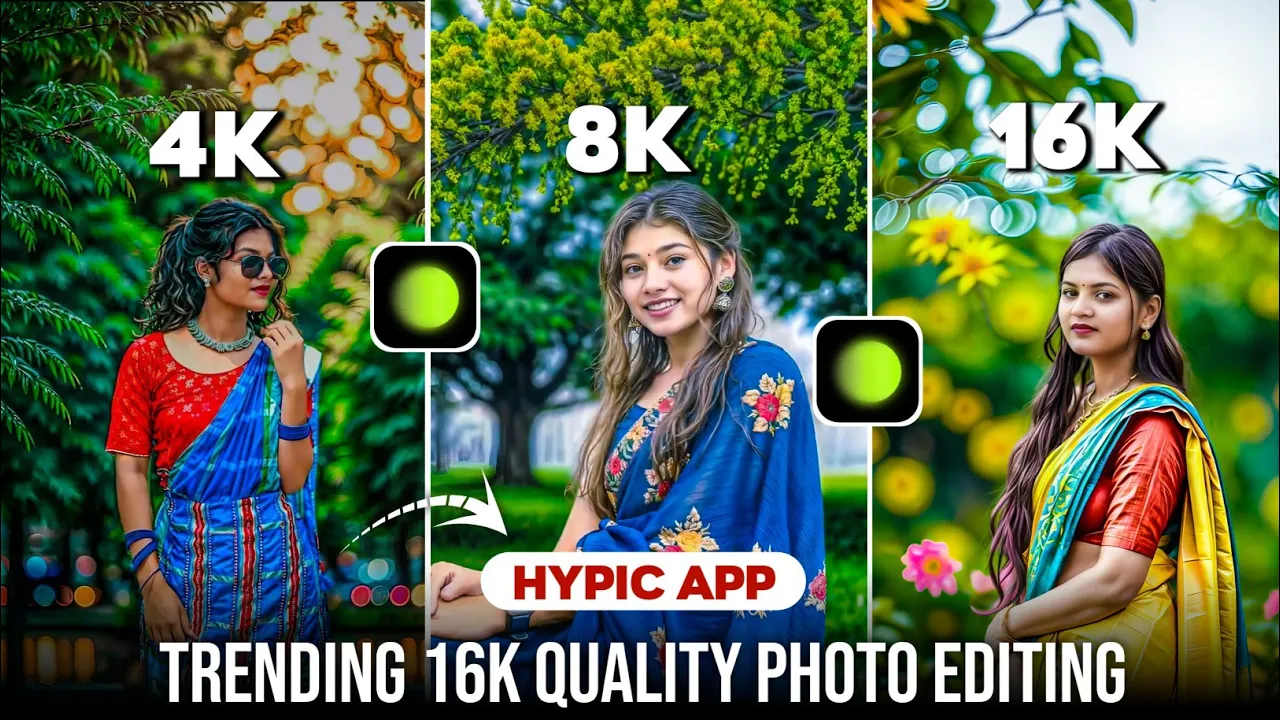
How to Edit Photos in 4K, 8K, or Even 16K Quality in Just 2 Steps
Do you want your regular photos to look like professional DSLR shots with stunning clarity? In this tutorial, I’ll show you how you can easily edit your photos into 4K, 8K, or even 16K resolution in just two simple steps. These high-quality images are currently trending on Instagram and getting massive engagement.
We’ll be using a combination of AI-powered background generation and AI upscaling tools. No expensive camera or professional skills are required!
Step 1: Change or Regenerate the Background
The first step is to enhance your photo’s background using photo editing apps. You can use any of these popular apps:
Here’s how to do it using Hypic (same process works for other apps):
- Open the app and tap on Start Editing.
- Select your desired photo from your device.
- Go to Adjust → Crop and frame only the subject (head to toe).
- Click on AI Expand and choose your aspect ratio.
- Type your desired background in the prompt box. For example: “Realistic HDR bokeh effect over a green forest and sunset, with a river and pink flowers”.
- Click Generate and wait for AI to create 3 unique backgrounds.
- Pick your favorite and save the photo.
Pro Tip: You can experiment with different prompts like “blue sky”, “beach sunset”, or “mountain landscape” for creative results.
Step 2: Increase Photo Quality to 4K, 8K, or 16K
Once your photo background is ready, it’s time to enhance its resolution using AI upscaling. For this, we’ll use Krea AI. Since this tool can be slow without a VPN, connect to a VPN first (for example, Poxy VPN).
- Connect your VPN to any server.
- Open Chrome and visit Krea AI.
- Sign in using your Google account.
- Enable Desktop Site in Chrome for better usability.
- Go to the Scaler / Enhancer option.
- Upload your edited photo.
- Select the upscale strength — 2x, 4x, or 8x. (You can repeat this process to reach 16K or even 32K resolution.)
- Click Enhance and wait for the AI to process the image.
- Download the enhanced photo to your device.
Bonus: Perfecting the Face & Colors
Sometimes AI upscaling can slightly change facial details. To fix this, use PicsArt:
- Open your enhanced photo in PicsArt.
- Import your original photo as a new layer.
- Use the eraser tool to reveal the original face while keeping the enhanced background.
You can also adjust color grading using Adobe Lightroom for more professional results — increase saturation, adjust temperature, and add clarity for a more vibrant look.
Before & After Example
Here’s what you can expect after following these steps:
- Before: A normal, low-quality image with a dull background.
- After: A crystal-clear 16K image with a stunning, AI-generated background — perfect for Instagram, prints, or wallpapers.
Final Thoughts
With just two steps — background regeneration and AI upscaling — you can turn any ordinary photo into a viral-quality masterpiece. Whether you’re a content creator, photographer, or just want amazing social media pictures, this method is fast, free, and incredibly effective.
Try it today using apps like Hypic, PhotoRoom, and Krea AI to create images that stand out from the crowd.